Most people pick light fixtures the same way they pick throw pillows — by how they look in the store. But a beautiful fixture in the wrong position, with the wrong bulb, creates a room that feels flat, harsh, or just plain off. Good lighting design isn’t about buying the right product. It’s about understanding how light layers work together to shape how a room feels and functions.
This guide walks you through every layer of residential lighting — from the broad wash of ambient light down to the focused beam of a reading lamp — and shows you how to apply those principles room by room.
Key Takeaways
- Three layers matter most: ambient (general), task (functional), and accent (decorative) light work together — no single layer does everything alone.
- Color temperature changes everything: warm white (2700K–3000K) suits living areas; cool white (3500K–4000K) suits kitchens and workspaces.
- Dimmers are non-negotiable: they let one room serve multiple moods without changing a single fixture.
- Scale fixtures to room size: a fixture that looks large in a showroom can disappear in a high-ceilinged room.
- Start with a lighting plan before you buy: map switch locations, ceiling heights, and natural light sources first.
- Every room has a different primary need: kitchens need task light, bedrooms need soft ambient light, bathrooms need shadow-free task light.
What Are the Three Layers of Interior Lighting?

Quick Answer: The three lighting layers are ambient (general overhead light filling the room), task (focused light for specific activities like cooking or reading), and accent (directional light highlighting objects or architecture). All three layers together create a balanced, functional space.
Think of your room’s lighting like a recipe with three ingredients. Use only one and the dish falls flat. Ambient light is the base — it fills the space evenly so you can navigate safely. Task light is the tool — it focuses where you’re working so your eyes don’t strain. Accent light is the garnish — it adds depth, draws attention, and gives the room a finished look.
Most rooms struggle because they rely on a single overhead fixture for all three jobs. That one light can’t do everything well. A recessed ceiling light floods the room but casts harsh shadows on a countertop. A floor lamp creates a cozy reading nook but leaves the corners dark.
Ambient Lighting: The Foundation Layer
Ambient light sets the overall brightness of a room. Common sources include flush-mount ceiling fixtures, recessed downlights, and chandeliers. The goal is even, glare-free coverage across the floor area.
A common mistake is placing too few recessed lights too far apart. Designers generally space recessed downlights at half the ceiling height apart. In an 8-foot ceiling room, that means lights spaced roughly 4 feet apart for even coverage.
Task Lighting: The Functional Layer
Task light is positioned where you work. It needs to be bright enough to prevent eye strain without creating glare on reflective surfaces. Under-cabinet strips in kitchens, pendant lights over islands, and desk lamps in home offices all serve this function.
The light source should sit in front of and slightly above your work surface — not behind you. Light from behind creates shadows directly where you need to see most.
Accent Lighting: The Depth Layer
Accent light directs attention. It highlights artwork, architectural features, shelving, or textured walls. The standard ratio for accent lighting is three times brighter than the ambient light level it sits next to. That contrast is what makes the feature pop.
Track lighting, directional recessed fixtures, picture lights, and LED strip lights installed in coves or shelving are all common accent solutions.
How Do You Choose the Right Color Temperature for Each Room?
Quick Answer: Color temperature is measured in Kelvin (K). Use 2700K–3000K warm white in bedrooms and living rooms for a cozy feel. Use 3500K–4000K cool white in kitchens, bathrooms, and offices for clarity and focus.
Color temperature is one of the most impactful — and most misunderstood — lighting decisions you’ll make. It controls whether a room feels warm and relaxing or bright and energizing. The Kelvin scale measures this, and every bulb package shows a K value.
Warm white light (2700K) mimics incandescent bulbs. It flatters skin tones, makes wood finishes glow, and creates the kind of soft atmosphere that works in social and sleeping spaces. Cool white light (4000K) is sharper. It reduces eye strain during detailed tasks and makes white surfaces look crisp.
Color Temperature Reference Table
| Color Temperature | Appearance | Best Used In | CRI Recommendation |
|---|---|---|---|
| 2700K | Warm white / soft yellow | Bedrooms, living rooms, dining rooms | 90+ CRI |
| 3000K | Warm white / neutral | Kitchens, hallways, bathrooms | 90+ CRI |
| 3500K | Neutral white | Home offices, laundry rooms | 80+ CRI |
| 4000K | Cool white / crisp | Garages, utility rooms, task areas | 80+ CRI |
| 5000K–6500K | Daylight / blue-white | Art studios, inspection areas | 90+ CRI |
What Is CRI and Why Does It Matter?
CRI stands for Color Rendering Index. It measures how accurately a light source shows the true colors of objects compared to natural sunlight. The scale runs from 0 to 100. A CRI of 90 or above means colors look natural and vibrant. A CRI below 80 can make food look unappetizing, skin look dull, and paint colors misleading.
Always check CRI alongside Kelvin when buying bulbs. A 2700K bulb with a CRI of 75 will make your warm living room look washed out. A 2700K bulb with a CRI of 95 will make everything in that room look rich and real.
Which Fixture Styles Work Best in Residential Spaces?
Quick Answer: Flush mounts suit low ceilings (under 8 feet), pendants work over islands and dining tables, chandeliers anchor large rooms with high ceilings, and recessed downlights provide clean ambient coverage in almost any room.
Fixture style affects both function and visual weight. The wrong fixture scale is one of the most common decorating mistakes. A small pendant over a large dining table looks timid. An oversized chandelier in a low-ceilinged entry feels oppressive.
Fixture Style and Application Guide
| Fixture Type | Best Application | Ceiling Height Needed | Typical Diameter Range |
|---|---|---|---|
| Flush Mount | Bedrooms, hallways, closets | 7–9 ft | 10–18 inches |
| Semi-Flush Mount | Kitchens, entry foyers | 8–10 ft | 12–20 inches |
| Pendant (single) | Over kitchen islands, bedside | 8+ ft | 6–16 inches |
| Linear Pendant | Dining tables, kitchen islands | 9+ ft | 24–60 inches long |
| Chandelier | Dining rooms, living rooms, foyers | 9+ ft | Add 1 inch per foot of room width |
| Recessed Downlight | Any room, primary ambient layer | 8+ ft | 4–6 inch trim diameter |
| Track Lighting | Art walls, open kitchens, hallways | 8+ ft | 24–96 inches track length |
| Wall Sconce | Flanking mirrors, hallways, bedrooms | Any height | Mounted 60–66 inches from floor |
How Do You Size a Chandelier for a Room?
The easiest sizing formula: add the room’s length and width in feet, and that total in inches gives you the ideal chandelier diameter. A 12-by-14-foot room (26 feet combined) calls for a chandelier roughly 26 inches wide. Over a dining table, the fixture should be about half the table’s width and hung so the bottom sits 30–36 inches above the tabletop.
How Should You Plan Lighting for a Living Room?
Quick Answer: Layer a living room with recessed ambient light on a dimmer, floor lamps or table lamps for task and secondary ambient light, and accent lights on artwork or shelving. Aim for 2700K–3000K throughout to keep the space warm and inviting.
Living rooms carry the most varied lighting demands of any room in the house. During the day you want bright, natural-feeling light. In the evening you want something that feels relaxed and social. That range is only possible with dimmers and multiple light sources working together.
Living Room Lighting Checklist
- Ambient layer: Recessed downlights or a central fixture on a dimmer switch
- Task layer: A floor lamp beside the sofa or armchair for reading
- Accent layer: Picture lights or directional recessed fixtures aimed at art or feature walls
- Supplemental ambient: Table lamps on side tables to add warmth and fill shadows
- Color temperature: 2700K–3000K throughout all sources for visual consistency
Place floor lamps so the bottom of the shade sits at roughly eye level when seated — about 40–42 inches from the floor. This puts the light at the right angle for reading without shining directly into your eyes.
What Is the Best Lighting Plan for a Kitchen?
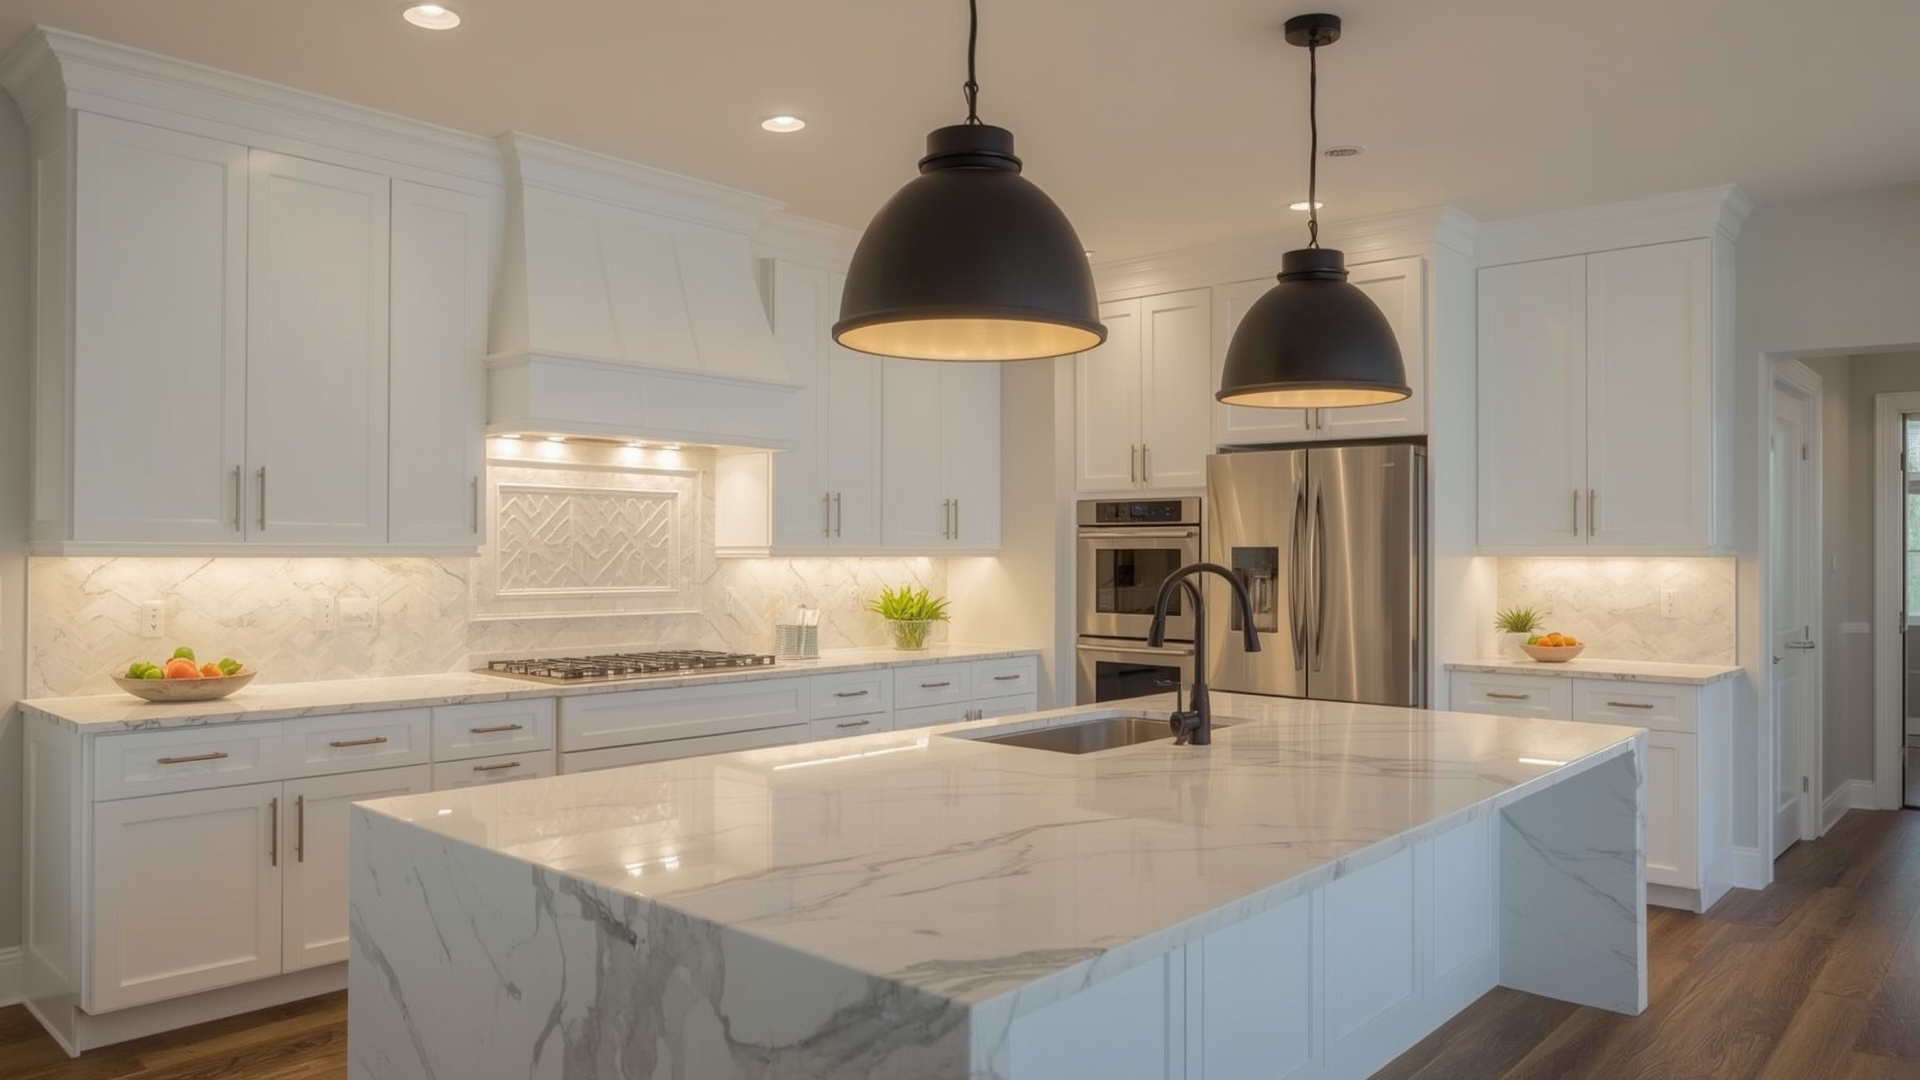
Quick Answer: A kitchen needs recessed ambient lighting, under-cabinet task strips over countertops, and pendant fixtures over islands or peninsulas. Use 3000K bulbs for a clean, functional feel. Keep all circuits on dimmers for flexibility.
Kitchens need the most technical lighting of any residential room. You’re working with sharp tools, checking food color for doneness, and reading recipes — all tasks that demand accurate, shadow-free light.
Kitchen Lighting Layer Breakdown
Start with recessed downlights positioned directly above countertop work zones — not in the center of the room. Centering them leaves you working in your own shadow when you stand at the counter. Supplement with under-cabinet LED strips mounted at the front of the cabinet to cast light on the full countertop depth.
Over an island or peninsula, hang pendants 30–36 inches above the surface. If you’re using a linear pendant over a long island, the fixture length should be about two-thirds the island’s total length.
Kitchen Lighting EAV Table
| Lighting Element | Recommended Kelvin | Placement | Lumens Needed |
|---|---|---|---|
| Recessed downlights (ambient) | 3000K | Above work zones, 4 ft apart | 450–800 lumens per fixture |
| Under-cabinet LED strips (task) | 3000K–3500K | Front edge of upper cabinets | 200–400 lumens per linear foot |
| Island pendants (task/accent) | 3000K | 30–36 inches above surface | 800–1100 lumens per pendant |
| Cabinet interior lighting (accent) | 2700K–3000K | Inside glass-front cabinets | 100–200 lumens per shelf |
How Do You Light a Bedroom for Both Function and Relaxation?
Quick Answer: Bedrooms need soft ambient light on a dimmer at 2700K, bedside task lights for reading, and optionally a closet light with cool white (3500K) for accurate color matching when getting dressed. Avoid a single overhead fixture as the only source.
The bedroom’s lighting job is unique. In the morning you need enough light to get dressed and find matching colors. At night you need light soft enough to signal your body it’s time to wind down. These are almost opposite requirements.
Bedroom Lighting Placement
Mount bedside sconces or pendant lights 24–30 inches above the mattress surface. This positions the light at the right level for reading without illuminating your partner’s side of the bed. Use directional shades that direct light downward onto the book, not across the room.
A dimmer on the main overhead circuit is essential. Dropping brightness 30–40 minutes before sleep reduces blue light exposure and helps your body produce melatonin naturally. Pair this with 2700K warm white bulbs, which emit minimal blue-wavelength light.
What About Closet Lighting?
Closet lighting is often forgotten, then immediately regretted. A dark closet means poor color matching and wasted time. Install LED strip lights or a flush-mount fixture at 3500K for accurate color rendering. This is one of the few spaces in a home where cooler, more neutral light genuinely serves you better than warm white.
What Lighting Works Best in a Bathroom?

Quick Answer: Bathroom lighting needs shadow-free task light around the mirror for grooming, plus ambient lighting for the overall space. Mount vanity lights at eye level on both sides of the mirror — not overhead — to eliminate face shadows. Use 3000K for a clean, flattering look.
The most common bathroom lighting mistake is a single fixture mounted above the mirror. This casts shadows under your nose, chin, and eyes — exactly where you need accurate light for shaving or applying makeup.
Bathroom Vanity Lighting Setup
The best vanity lighting flanks both sides of the mirror with vertical bar fixtures or individual sconces. Mount them at eye level, roughly 60–65 inches from the floor to the center of the fixture. This wraps the face in light from multiple angles, eliminating shadows.
If flanking isn’t possible due to cabinet placement, a horizontal bar mounted above the mirror works — but place it as close to the top of the mirror as possible and use a high-CRI bulb (90+) to compensate.
Bathroom Lighting EAV Table
| Fixture Position | Type | Height from Floor | Kelvin | Minimum Lumens |
|---|---|---|---|---|
| Vanity side sconces | Vertical bar or single sconce | 60–65 inches (center) | 3000K | 450 lumens each side |
| Vanity overhead bar | Horizontal bar fixture | Top of mirror + 3 inches | 3000K | 1200–1600 lumens total |
| Ceiling ambient | Recessed or flush mount | Ceiling height dependent | 3000K | 800–1200 lumens |
| Shower niche | Recessed IP65-rated fixture | Niche depth | 3000K | 300–450 lumens |
How Do You Design Lighting for a Home Office?
Quick Answer: A home office needs glare-free ambient lighting, a dedicated desk lamp for task work, and monitor positioning that avoids light reflections. Use 3500K–4000K to support alertness and focus. Keep window light to the side of your monitor, not behind or in front of it.
Screen glare is the enemy of home office lighting. When your ambient light source reflects off your monitor, your eyes constantly adjust between the bright reflection and the darker screen. Over a long workday, this creates real fatigue.
Reducing Screen Glare in Home Offices
Position your desk so windows are to your left or right — never directly in front or behind your screen. Use a task lamp with an adjustable arm and a solid shade that prevents light from spilling sideways into your line of sight. LED desk lamps with a built-in dimmer and adjustable color temperature give you control over both brightness and warmth throughout the day.
Circadian Lighting in Work Spaces
Circadian lighting means adjusting color temperature to match the time of day. In the morning, cooler light (4000K) supports alertness. By late afternoon, shifting to warmer light (3000K) helps prepare your body for the evening. Some smart bulb systems like Philips Hue and LIFX automate this transition on a daily schedule.
What Are the Best Lighting Strategies for Small Rooms and Low Ceilings?
Quick Answer: In small rooms or rooms with low ceilings, use flush-mount fixtures to preserve headroom, add wall sconces to draw the eye sideways instead of up, and use uplighting to make ceilings appear higher. Light-colored walls and mirrors amplify the effect of every fixture you install.
Low-ceiling rooms below 8 feet have limited fixture options. A chandelier or pendant that works in a tall space can feel claustrophobic when the bottom of the fixture is just 6 feet off the ground. Flush and semi-flush mounts are the safe default.
Visual Height Tricks with Lighting
Uplighting — directing light upward toward the ceiling — visually raises the perceived ceiling height. Torchiere floor lamps, cove lighting built into crown molding, and wall sconces with upward-facing shades all create this effect. Combine uplighting with a lighter ceiling color and the room reads as significantly taller than it is.
In small rooms, avoid placing multiple light sources at the same height. Stagger them — a low floor lamp, a mid-height sconce, and a ceiling fixture — so the eye moves through different vertical zones. This makes the space feel larger and more dynamic.
How Do Dimmers and Smart Lighting Systems Change a Home’s Lighting?
Quick Answer: Dimmers let you adjust brightness from 100% to around 10% without changing fixtures, allowing one room to serve multiple moods. Smart lighting systems add scheduling, color temperature control, and voice or app control. Both dramatically extend how useful your existing fixtures are.
A dimmer switch costs between $15 and $50 per circuit and is one of the highest-value lighting upgrades in any room. It converts a room from single-mode to multi-functional without any rewiring of fixtures or bulbs (assuming you use dimmable LEDs).
Smart Bulb Systems Comparison
| System | Color Temp Range | Color Options | Hub Required | Cost per Bulb (approx) |
|---|---|---|---|---|
| Philips Hue White Ambiance | 2200K–6500K | White only | Yes (Hue Bridge) | $20–$25 |
| Philips Hue Color | 2000K–6500K | 16 million colors | Yes (Hue Bridge) | $45–$55 |
| LIFX A19 | 2500K–9000K | 16 million colors | No hub needed | $35–$45 |
| Kasa Smart (TP-Link) | 2500K–6500K | Color models available | No hub needed | $12–$20 |
| Lutron Caseta (switch-based) | Dependent on bulb used | Bulb-dependent | Yes (Smart Bridge) | $60–$80 per switch |
Switch-based systems like Lutron Caseta control entire circuits rather than individual bulbs. This is more practical in rooms with multiple recessed lights on one circuit — you get full dimming without replacing every bulb with a smart version.
How Do You Create a Room-by-Room Lighting Plan Before You Buy?
Quick Answer: Start with a floor plan sketch and mark ceiling height, window locations, switch positions, and existing electrical boxes. Layer in ambient sources first, then task zones, then accent points. Confirm every circuit has dimmer capability before selecting fixtures.
Planning before purchasing prevents the most expensive lighting mistakes. The order of decisions matters: electrical constraints come first, then function, then aesthetics. Choosing a fixture you love before checking whether your ceiling can support the wiring — or whether it works with a dimmer — often means returning it.
Lighting Plan Checklist
- Measure ceiling height in every room — this limits fixture types
- Mark window locations — natural light affects how much artificial light you need and where
- Identify switch locations — rewiring is costly; work with existing switch positions where possible
- List primary activities per room — this determines which task lighting zones you need
- Choose ambient fixtures first — they set the structural layout
- Layer in task zones — counter positions, desk locations, reading chairs
- Add accent points last — art walls, display shelves, architectural details
- Confirm all circuits are dimmer-compatible — and that all LED bulbs are rated as dimmable
Frequently Asked Questions
What is the difference between lumens and watts in lighting?
Lumens measure the amount of light a bulb produces. Watts measure how much energy it uses. With LED bulbs, a 10-watt LED can produce 800 lumens — the same output as a 60-watt incandescent. Always buy by lumens, not watts, when choosing brightness for a space.
Can you mix warm and cool light sources in the same room?
Mixing color temperatures in the same room creates visual inconsistency. Your eye notices when one light looks yellow and another looks blue-white. Stick to one Kelvin value across all sources in a single room. The exception is closet lighting, where a cooler temperature serves a different function than the rest of the bedroom.
What does IP65 mean on bathroom fixtures?
IP65 is an Ingress Protection rating. It means the fixture is fully dust-tight and protected against water jets from any direction. This rating is required for light fixtures installed directly inside showers or above bathtubs. Standard indoor fixtures without an IP rating should not be used in wet zones.
How many recessed lights do you need per room?
A simple starting point: divide the ceiling height by 2, then space fixtures that many feet apart. In a room with an 8-foot ceiling, place recessed lights roughly 4 feet apart. Then count how many rows and columns that creates across your floor plan. Rooms with more than one functional zone may need additional lights targeted at each zone.
Do LED bulbs work with all dimmer switches?
No. Older dimmer switches designed for incandescent bulbs often cause LED bulbs to flicker, buzz, or fail to dim smoothly. Use dimmers rated for LED loads — brands like Lutron and Leviton make LED-compatible dimmers starting around $15. Always check that the LED bulb packaging says “dimmable” before installing it on a dimmer circuit.
What is the best lighting for a dark room with no windows?
Windowless rooms benefit most from higher ambient light levels (150–200 foot-candles) and full-spectrum bulbs in the 3500K–4000K range to simulate natural daylight. Use multiple light sources at different heights to prevent the flat, cave-like feeling that a single overhead fixture creates. Mirrors and light-colored paint amplify the effect of every lumen you add.